How To Flush A Radiator With A Garden Hose
How To Flush A Radiator With A Garden Hose
How To Flush A Radiator With A Garden Hose
Flushing and cleaning your radiator used to involve a long manual process, but with the addition of a garden hose much of the hassle has been eliminated. The process, while simple, is important to maintaining the life of your engine. Here's a breakdown of how to flush a radiator with a garden hose.
Prepping the Vehicle for Flushing
Before beginning the actual flushing process, it's important to make sure your vehicle is properly prepared. First, disconnect the negative battery terminal to avoid electrical interferences. Next, locate where your vehicle's drain cock is located in the radiator once located, loosen the nut on the valve with a crescent wrench. After loosening the valve, place a large drain pan underneath the radiator's drain cock to catch the flushed fluids (making sure the pan is large enough so the fluids do not overfill onto your driveway).
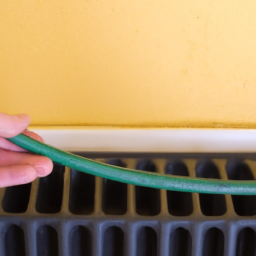
Locating the Coolant Reservoir
Next, locate your vehicle's coolant overflow reservoir, which is typically located near the radiator. Make sure the coolant level is full and then attach the garden hose to the coolant overflow reservoir.
Starting the Flushing Process
Put on your safety gear (i.e., protective glasses and gloves) and have a friend help you with the flushing process. Have your friend start the car's engine and then open the valve on the radiator. This will begin to flush out any debris, impurities, and muck inside the radiator. This is important to keep the radiator working optimally. The flushed liquids should flow out from the drain cock to the pan underneath the radiator.
Ensuring the Radiator Is Flushed Properly
Now, turn off the engine to ensure the radiator is flushed thoroughly and for the full length of the radiator hose. To ensure a thorough and proper flush, flush the radiator at least twice with new water each time. After the radiator has been flushed twice and is free of debris, turn the engine back on and see if the water is still in the radiator without leaking.
Cleaning the Radiator
After flushing the radiator, it's important to clean the radiator so it remains efficiently working. To clean the radiator, pour a few gallons of vinegar in it and let it sit for a few hours. This will help break up any build-up on the radiator walls and further remove impurities. After a few hours have passed, run the engine with the radiator cap off in order to clean out any of the remaining vinegar and debris.
Refilling the Radiator With Coolant
Once the radiator has been flushed, cleaned, and re-filled with water, it's time to fill it up with antifreeze. To do this, add a mixture of 75% antifreeze and 25% water into the radiator. You may also opt to completely eliminate water from the mixture and fill the radiator with 100% antifreeze instead. After the antifreeze has been added, replace the radiator cap and start your engine to double check that the radiator is not leaking fluid.
In Summary
Flushing a radiator with a garden hose is easy and relatively quick. Before beginning the flushing process, there are a few steps you must take in order to prepare the car for flushing: disconnecting the battery, locating the drain cock and the coolant overflow reservoir, and making sure the coolant level is full. After the flushing and cleaning process is complete, be sure to refill the radiator with antifreeze and start the engine to make sure the radiator is not leaking fluid. Flushing and cleaning a radiator periodically is important in order to maintain the vehicle's engine and keep it running efficiently.
Thanks for reading!
References:
- https://denlorstools.com/blog/how-to-flush-a-radiator-with-a-garden-hose
- https://mechanicbase.com/diy/how-to-flush-a-radiator/
- https://www.popularmechanics.com/cars/how-to/a32576/how-to-flush-a-radiator/
Previous Page
Next Page