Fixing a Hole in a Garden Hose DIY Guide
How To Fix Hole In Garden Hose
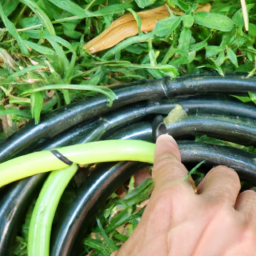
Determining How To Fix Hole In Garden Hose
Evaluating the Damage
The first step in fixing a hole in a garden hose is assessing the damage. First, identify the hole. This is best done by gradually running water through the length of the hose. Look for signs of leakage and track where the water is coming from to the source of the leak. If the hole is large, the only option is to replace the hose.
Determine the size of the hole. Small holes can typically still be repaired, while larger ones may require that you simply discard the hose and purchase a new one. Take note of the area around the hole for potential damage and other materials that you may need to address later.
Gathering Tools and Materials
Now that you have evaluated the damage, it's time to gather the materials and the tools you'll need to fix the hole. For small holes, you will only need a few items. First, you will need a patch or a patch kit, available at most stores that stock garden supplies. You will also need a pair of scissors, an old toothbrush, and some fingernail clippers. The clippers will come in handy if you need to trim the edges of the patch to fit it over the hole.
Patch Selection
Before you buy any patch, make sure it is the right size and type for your garden hose. Not all patches will fit the same size hose, for example. Read the instructions on the package carefully, and always double-check the size or type of patch you purchase.
Once you have the right patch size and type, you may need to trim it. This is best done with scissors or nail clippers. Depending on the patch size and type, you may need to trim the patch to make sure it fits evenly over the hole in the hose.
Applying the Patch
Once you have the right size patch and the necessary tools, it's time to apply the patch to the garden hose. Start by cleaning the area around the hole with an old toothbrush. Work the bristles around the edges of the hole and remove any dirt or debris that may have accumulated there.
Once the area is clean, apply the patch to the hose. Make sure the patch is centered over the hole and firmly adheres to the hose. If the patch is not adhering properly, you may want to use some adhesive to help keep it in place.
Inspecting the Repair
Once the patch is firmly in place, it's time to test it. Gently pressurize the hose by running water through it. Listen for any leaks and observe the area around the patch for signs of water. If there are no leaks, then the patch has done its job and you can secure it in place with some adhesive or duct tape.
Closing Remarks
Fixing a hole in a garden hose can be a tricky business. It's important to assess the damage first and determine the size and type of patch needed. Gather the supplies and carefully apply the patch, ensuring it is centered over the hole. Once it is in place, gently pressurize the hose and inspect for any signs of leaks. If there are no leaks, the patch is successful!
Previous Page